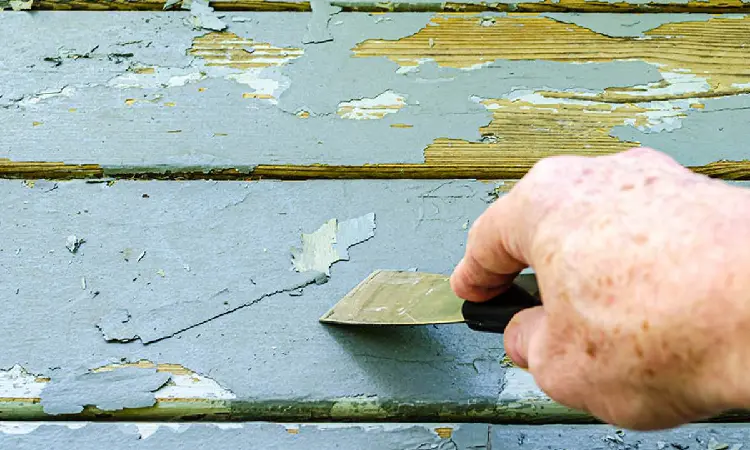
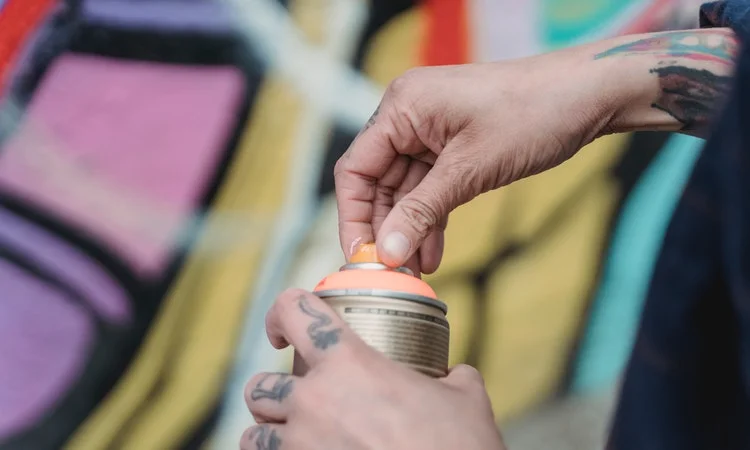
Did you dig out that spray paint bottle only to find it is clogged and will not work? Or maybe it clogged while you were using it?
The nozzle on spray paint allows for easy, hassle-free painting. That is, until the nozzle becomes clogged with paint. Are there any ways to unclog the paint from a spray paint can?
It is easier to unclog the spray paint can while the clog is still fresh. Luckily for you, there are ways to remove the clog if the paint has been sitting for a long time.
You can use a wide variety of household items to unclog spray paint. Products such as rubbing alcohol, vinegar, warm water, and so much more can easily remove a clog from a can of spray paint.
In this article, I will give you several different methods that you can use to try to unclog the spray paint can.
I will also discuss what causes the spray paint nozzle to clog and so much more.
What Makes the Spray Paint Nozzle Clog?
A spray paint nozzle becomes clogged due to dry paint. The nozzle can become clogged by not being cleaned properly or by not having the excess paint expelled from it.
The plastic design of the nozzles also makes them clog relatively easily.
When a can of spray paint is not cleaned properly, paint can build up on the nozzle. The paint build-up can harden and become difficult to unlodge later on.
This is the main issue that causes a spray paint nozzle to clog. It is also possible for a can of spray paint to clog while using it.
The spray paint could clog during use if you did not shake up the paint enough. Spray paint contains substances that mix well together.
However, when the spray paint is not mixed properly, the substances can get clogged inside the nozzle of the can.
The other main reason the nozzle gets clogged is that the paint is not fully expelled from the can. After every use, the can of spray paint should be turned upside down and sprayed.
This allows the can of spray paint to expel any paint sitting in the line. When you turn the can of paint upside down and expel the air, you also clean out the nozzle.
How do You Know if Your Spray Paint is Clogged?
You will often know the spray paint is clogged because it will be difficult to spray.
The nozzle may not be able to be pushed down as easily as before. It can also be harder to shake the can when you mix the paint.
You can also tell the spray paint is clogged if the paint is coming out of the nozzle in splatters or chunks. The spray paint should come out in a steady stream.
It should not come out chunky, thick, or splatter onto the item you are trying to paint.
How to Unclog the Spray Paint Can Nozzle?
Thankfully, it is possible to unclog a can of spray paint. The method you use will depend on whether the can of spray paint clogged while you were using it. Or if it became clogged while it was sitting in storage.
It is easier to unclog the spray paint can immediately after it clogs. You can turn the can upside down and expel the paint.
This should release any substance that has formed the clog. If your spray paint has been sitting for a while, you should keep reading for solutions.
To unclog a spray paint can, you must remove the nozzle from the can.
It’s a simple process and should not require the use of tools. You should be able to twist the nozzle off relatively easily.
Be careful you do not lose the nozzle. The nozzles are small pieces of plastic that can easily be misplaced.
Once you have removed the nozzle, you can use the methods below to dislodge the clog that is in the nozzle.
I hope one of the methods I mention helps you and you can get back to your spray painting projects.
You may need to try more than one method to unclog the can of spray paint. I have listed these methods from what you should try first to your last resort option.
Please remember all of the steps in these methods assume you removed the nozzle from the spray paint can.
Needle or Safety Pin
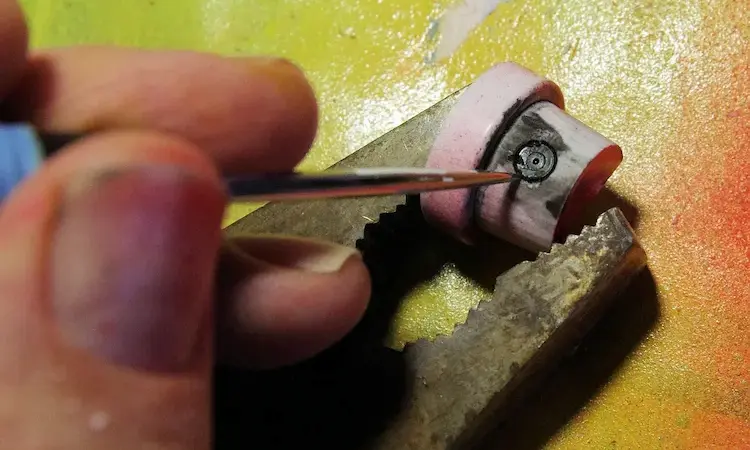
When people realize their can of spray paint is clogged, they often reach for a needle first. Most people have a needle, safety pin, or wire hanger somewhere in their household.
The availability of this object makes it one of the most common methods to unclog a spray paint can.
You can use a needle or safety pin to scrape away dried-on paint gently. You may start by scraping away paint that you visibly see on the outside of the nozzle.
It is possible for the paint to dry on the outside of the nozzle and, therefore, can clog the nozzle.
If that does not solve the problem, you will have to insert the needle into both ends of the nozzl
. Extra caution should be used when the needle is in the middle or center of the nozzle. Any sharp object can cause damage to the nozzle.
You should remember that the nozzle is only made of plastic, making it easy to damage.
While a needle may effectively remove a clog from spray paint, it is not always recommended as it can cause more harm than good.
Many of the other methods I will mention will still require a needle. Just use caution and be careful when handling the needle and the nozzle.
You do not want to damage the nozzle or accidentally stab yourself when removing a clog from the spray paint can.
Warm Water
Warm water is one of the easiest and simplest methods to remove a clog from the nozzle of spray paint.
You can use a bowl of warm water or a rag soaked in warm water. The nozzle can soak in the warm water until the water loses heat.
The heat from the water should soften the paint and debris, which will make it easier to remove the clog.
Unfortunately, hot water will not remove the paint on its own. The hot water will only soften the paint that is clogging the nozzle.
After the nozzle has soaked in the water, you can use a needle to clear the clog. The needle can be inserted into both ends of the nozzle. You should let the nozzle fully dry before placing it back on spray paint.
While warm water may be one of the safer options for your health, it is not the best option.
You will most likely have to repeat this process multiple times. Once the nozzle is removed from the warm water, the paint will harden again.
This process can take way longer than it is worth. But, by all means, you can give it a try. It will work best for nozzles that have a minuscule amount of paint on them or nozzles that clog while using it.
Paint Thinner
You can use a paint thinner to unclog the paint that is in the nozzle of the spray paint can.

You should wear gloves and a mask while you handle paint thinner.
Simply pour some paint thinner into a small bowl and let the nozzle soak for approximately 2 hours.
The nozzle can deteriorate in the paint thinner if it is left to soak for more than a couple of hours.
Therefore, you should monitor the nozzle and not let it soak for longer than 2 hours. The paint thinner will soften any dried paint or other debris forming the clog in the nozzle.
After the nozzle has soaked in the paint thinner, you can rinse it with warm water to remove the softened paint.
Then you can use a needle or wire hanger to dislodge the clog. You can insert the needle or hanger into both ends of the nozzle.
You must be very careful because the needle can damage the nozzle. You can swirl the needle around to help dislodge any debris.
Paint thinner is one of the best ways to remove paint from objects. However, you should be very careful when you use it on pieces of plastic, such as the spray paint nozzle.
The paint thinner can easily deteriorate and destroy plastics.
Again, if you choose to use this method, proceed with caution.
Aerosol Lubricant
An aerosol lubricant can be a great tool to release a clog in a spray paint nozzle.

You will need to replace the nozzle on an aerosol lubricant can with the clogged nozzle from the spray paint.
Then press on the nozzle to force the lubricant through it.
You can repeat this several times until the clog is gone. If the clog is not dislodging, there is something else you can try.
You can remove the nozzle and spray the lubricant directly into the nozzle’s interior and exterior openings.
Once the nozzle is fully lubricated, you can return the nozzle to the lubricant can and spray lubricant through it again.
These steps can be repeated until the clog is removed or until you give up and want to try another method.
You should wear gloves while you try this method. Lubricants are very oily and greasy.
I doubt you want oil all over your hands. The oils can also easily stain clothes and other fabrics.
Rubbing Alcohol
Did you know you can soak the nozzle from spray paint in rubbing alcohol?

Well, now you do. You can place the nozzle in a bowl of rubbing alcohol and let it soak for a couple of hours.
Then you will rinse the nozzle with warm water and return it to the spray paint can.
You should try to spray paint through the nozzle. If it does not work, you can repeat the steps as necessary.
You should make sure the nozzle is fully dry before placing it back on the spray paint can.
If the nozzle is not allowed to dry fully, you risk rubbing alcohol getting inside the can of paint.
Rubbing alcohol can denature any kind of paint. You can let the nozzle air dry for an hour or use a hairdryer to dry it in less time.
You may need to use a needle or safety pin to remove the clog that is in the nozzle. Sometimes the rubbing alcohol is not enough to remove the clog when used on its own.
You should also wear gloves when working with rubbing alcohol as it can easily dry out your hands.
Vinegar
You can use vinegar in the same process as rubbing alcohol to remove a clog from a can of spray paint.

The acid in the vinegar softens water-based and oil-based paints. The vinegar will not fully dissolve the paint. It will only soften the paint.
Once the nozzle has soaked in vinegar, you will need a needle to remove the clog.
Remember that the needle should be inserted into both openings on the nozzle.
You will have to let the nozzle fully dry before placing it back on the can of spray paint.
Vinegar is corrosive when in contact with metal. Many spray paint nozzles are plastic, but the can is metal.
You do not want the vinegar to come in contact with the metal and ultimately make the spray paint can rust and corrode away.
WD-40
I was surprised to find out that WD-40 can be used to unclog a can of spray paint.

You can spray WD-40 directly into the clogged nozzle. It should loosen up any dried bits of paint clogging the nozzle.
Once the paint has been loosened, you can use a safety pin to scrape off the weakened paint pieces.
Again, you will have to allow the nozzle to dry completely before using it to spray paint. You can repeat this process as many times as you would like.
Gloves should also be worn when handling WD-40. The product is greasy and is not meant to contact your skin.
You may even want to wear a mask to protect yourself from the fumes that WD-40 gives off.
New Nozzle
This method is your absolute last resort. Or maybe it is the first resort if you do not want to try other methods.

You can easily replace the clogged nozzle with a nozzle from another can of spray paint.
You should ensure you replace the nozzle with a similar brand and type of paint.
Different paints have different viscosities and therefore require different nozzles.
For instance, water-based spray paint is generally thinner than oil-based spray paint.
Many people who use spray paint consistently choose to keep empty cans simply for their nozzles.
If you have the space, this is a great idea. You can also remove the nozzles and store them in a bag.
There is a downside to storing extra nozzles without their bottles.
You will not be able to verify the type of paint that the nozzle was originally intended to be used with.
You do not want to replace the nozzle and wind up with another clog because you replaced it with the wrong kind of nozzle.
How to Keep Spray Paint Nozzle From Clogging
There are a couple of things you can do to prevent spray paint from clogging.
The first option is to turn the can upside down after every use and clear the paint. The other option is to use a cloth to wipe away the paint on the nozzle.
For the best outcome, you should perform these two tasks together.
When you turn the can upside down and spray it, you release the paint in the line and the nozzle. Remember that clogs are often formed by dried paint.
Therefore, if you clear the paint out, there is no way it can dry and form a clog. You should perform this task after every coat of paint.
The ten minutes for each coat of paint to dry is plenty of time for the paint to start drying in the can and create a clog.
You should also wipe the nozzle after every use. Sometimes the outside of the nozzle can get clogged with dried-on paint.
However, if you are wiping the nozzle after each use, there will be no paint to dry and potentially clog the can of spray paint.
How to Get Paint Out of a Permanently Clogged Spray Can
If your can of spray paint is permanently clogged, you may have to replace the nozzle.
You can try any of the methods mentioned earlier if you want. It is easier to remove a clog while the paint is still fresh.
Unfortunately, the longer the can of spray paint sits, the worse the clog becomes.
Sometimes there is no salvaging a can of spray paint, no matter how hard you try to remove the clog. It may save you more time and cause less of a headache to buy a new can of spray paint simply.
Verdict
These were several household items you could use to unclog a can of spray paint.
Unless you use a lubricant, make sure the nozzle is fully dry before putting it back on the can of spray paint.
Many of these household items work because they are known to soften the paint.
But you want them to soften the paint clogging the nozzle. You do not want these substances to affect the paint inside the spray paint can.