Do you have a stained wooden family heirloom that you want to give a facelift? Or maybe you bought a bookcase from the thrift store and want to repurpose it.
Either way, you probably wonder how and if you can paint over stained wood.
You are in luck. You can paint over stained wood, but it will require some work. First, you have to determine if the stain is oil-based or water-based. Then you will have to prep the wood based on the type of stain on its surface.
Oil-based stains will require more work than water-based stains. Oil-based products tend to have more chemicals, which can be more difficult to cover up.
If you do not properly prep the stained wood, you could have adhesion issues with the paint.
This article is going to explain how you can prep stained wood. I will also explain how to paint the wood after you have prepped it.
And do not worry. I will give you some recommendations for paint and primer.

Can You Paint Directly Over Stained Wood?
While it is possible to paint directly over stained wood, it is not highly recommended. The surface of the wood will require some prep work before you can paint it.
You will first have to determine if the wood has a layer of varnish and what type of stain was previously used.
The varnish can make the wood appear shiny. Varnishes add a layer of protection to wood surfaces. This layer of protection can make it difficult for a new coat of paint to adhere to any surface properly.
Therefore, you will need to remove the varnish. I will explain later how you can do that.
You will also have to determine what type of stain is on the wood. Water-based stains require less prep work than oil-based stains.
Oil-based stains contain significantly more chemicals. These chemicals can make it difficult for paint to adhere properly to the wood.
If you want to paint over oil-based stains, you must remove the chemicals on the wood. I will also explain that process later.
What if You Do Not Know What Stain You Used on the Wood?
Sometimes it can be hard to remember what stain you used on the wood.
Or maybe you are refinishing a piece of wood furniture you just purchased. Thankfully, there is a way you can tell if the stain is water or oil-based.
Oil and water do not mix. Therefore, if the stain is oil-based, it will repel any water. You can test this theory by sprinkling water on the surface of the wood. If the water forms little beads, then the stain is oil-based.
If you are still unsure, the safest option is to use a deglosser when preparing the surface of the wood.
The deglosser will remove any harsh chemicals that could prevent the paint from adhering to the stained wood.
Remember that oil-based stains have more chemicals than water-based stains. The deglosser will not harm the wood, no matter what stain is on it.
In fact, many DIYers choose to use a deglosser over sanding anyway. I will explain why later on.
What Happens if You Paint Over Stained Wood?
You can paint directly over stained wood. But it is not highly recommended.
When applied directly onto a stained surface, your paint will likely have adhesion issues. Each type of stain will have its own set of obstacles, which I will explain below.
Oil-Based Stain
Painting over oil-based stains is not a good idea without the proper prep work. You may not know whether the stain is oil-based or not.
If the stain is oil-based and you use water-based paint, the paint will not adhere to the wood.
Oil repels water, and therefore, oil-based stains will repel water-based paint. If the paint adheres to the wood, it will peel within weeks or months.
Compare this to when you make an oil and vinegar dressing. The two substances mix at first, but they will be completely separated within minutes.
Now, theoretically, you can paint over oil-based stains with oil-based paints.
However, you run a huge risk of the stain bleeding through the paint. It is also possible that the paint will not adhere properly.
It can be difficult for paint to adhere to the chemicals in oil-based stains. You will save time and money if you properly prepare the stained wood before painting it.
Water-Based Stain
You will have better luck applying water-based paint directly to a water-based stain.
I would still recommend that you prepare the surface before you paint it. You can still have adhesion and bleed-through issues with water-based paints.
While the stain finishes on the wood are created on purpose, they still act like any other stain.
When you have a water leak, the water can stain the wood or wall. Have you ever tried painting over a stain caused by water?
It can be very difficult to accomplish without the proper prep work. Stains caused by water damage need to be cleaned, sanded, and primed before they can be painted.
The stains used on wood need to go through a similar process.
How to Prep Stained Wood for Paint?
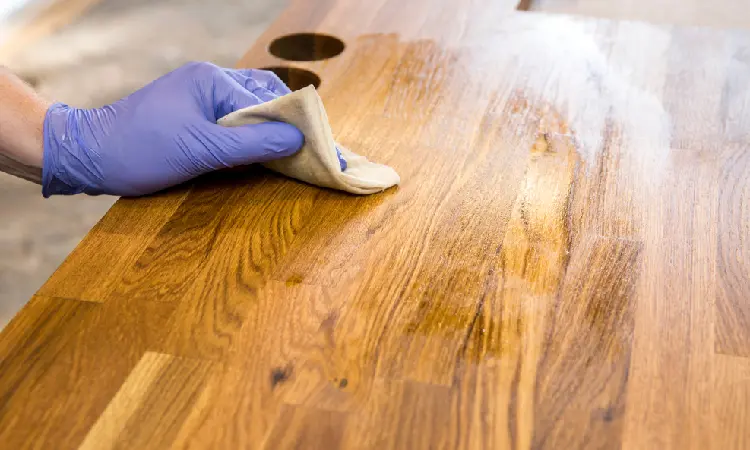
It is imperative you prep the stained wood for paint. It can be difficult for paint to adhere to a previous stain or paint.
The prep work will help prepare the wood so the paint can properly adhere to the surface. It will also prevent the stain from bleeding through the new paint.
Before you begin your prep work, you need to determine what type of stain is on the wood.
Oil-based stains will require more work before you can begin painting. Below, I will describe the steps to prep oil and water-based stained wood.
The steps will be fairly similar for either type of stain. However, things begin to differ when sanding the wood slightly.
For water-based stains, you can sand the surface like normal. In contrast, oil-based stains will need a deglosser, also known as liquid sandpaper.
Materials You Will Need:
- tarps
- screwdriver or flathead
- microfiber cloths
- clean washcloth
- 150-grit sandpaper
- face mask
- wood filler
If you are painting over an oil-based stain, you will also need a deglosser, a respirator, and gloves.
Step 1: Prepare Your Area
If you are painting inside, you will want to cover any furniture within reach. You will want to lay down a tarp whether you are painting inside or outside.
I highly recommend you use this time to gather all of the materials you need for this project.
Step 2: Remove the Hardware
You should remove any hardware from the wood. The hardware includes knobs, handles, hinges, and anything else that can get in your way.
It is easier to remove these items before cleaning or sanding the wood.
Step 3: Clean the Wood
You can use a microfiber cloth to remove any debris. You should use this as a great time to remove any dust and cobwebs gathered on the wood.
Then you can clean the surface with warm soapy water and a clean washcloth. Allow the wood to dry before continuing to the next step fully.
Step 4: Sand or Degloss the Wood
In this step, things will differ depending on the stain you are painting over.
You will sand the surface, similar to a normal painting project for water-based stains. In contrast, oil-based stains will require something more heavy-duty.
If the stain is water-based, you can sand the wood with 150-grit sandpaper. You should wear a mask while you sand this project.
The sanding will help rough up the surface and allow the paint to adhere better. Make sure you sand in the same direction as the wood grain.
If you sand against the wood grain, you risk causing damage to the wood’s surface.
You will need to apply a deglosser to the stain for oil-based stains. The deglosser sometimes referred to as liquid sandpaper, is a heavy-duty solvent.
This solvent is a harsh chemical. You will have to wear gloves and a respirator while using this product.
You can paint the liquid sandpaper onto the wood with a normal paintbrush. Let it sit for approximately 15 minutes.
You should be able to easily wipe away the deglosser with a washcloth. Make sure you remove all of the deglosser before continuing to the next step.
You can use soap and water to clean the surface of the wood. This will ensure you have removed all of the chemicals.
Using sandpaper, you should clean up all the dust with a vacuum and a microfiber cloth.
Step 5: Repair the Wood
It may seem counterintuitive to repair the wood after you have sanded it.
I recommend doing this step now because you will be able to spot damage better once the surface of the wood is clean and free of debris.
With a wood filler, you can repair any holes, scratches, or other damage you notice. You can apply the wood filler and let it dry per its instructions.
Once it is dry, you will want to sand the surface again. If you do not sand the surface, you risk having an uneven layer of paint.
What if the Stained Wood has a Waterproofing Quality?
A lot of stains contain a waterproofing ability. It can give the wood a glossy and smooth finish.
The waterproofing additive can make it difficult for paint to adhere to the surface of the wood. If you know your stain was a waterproofing stain, you will have to vigorously sand the wood or use a deglosser.
Can You Use a Deglosser Instead of Sandpaper?
If you do not want to sand the surface of the wood, you can use a deglosser. A deglosser is essentially liquid sandpaper.
It does the same job as sandpaper without the physical labor of scrubbing the wood.
Now, liquid deglosser is a toxic and harsh chemical. You should not use a deglosser lightly. You will have to wear gloves and use a respirator when using a liquid deglosser.
It is often unnecessary to use it on water-based stains as sandpaper will perform the same function.
However, if you are working on a large project, you can use a deglosser. The deglosser will take significantly less time than sanding, depending on the size of your project.
Deglosser is also water-based making it very easy to clean off your paint brushes when completing your project.
Do You Need a Primer to Paint Over the Stain?
Generally, it is recommended to use a primer when painting over stained wood. The stain can prevent the paint from properly adhering to the wood. However, the primer can help increase the paint and the wood bond.
You should use a stain-blocking primer. If you do not use a stain-blocking primer, the stain on the wood can bleed through the new paint.
The idea is to cover up the previous stain, not have it bleed through the new coat of paint.
Chalk paint may be the only type of paint where you do not need a primer before applying it on stained wood. You should test a small patch of chalk paint on the stained wood.
If there is no bleed-through after eight hours, you can paint without a primer.
What Kind of Paint Can You Use Over Stained Wood?
You can use any kind of paint to paint over stained wood. The style and look you want on the wood will determine the type of paint you use.
If you want a clean and smooth finish, you should use latex paint. Latex paints are fast-drying paints.
They are lower in volatile organic compounds (VOCs) compared to oil-based paints. They are also better at hiding brush strokes, making them great for smooth finishes.
Chalk paint is the best if you want your wood piece to look distressed. This paint will provide a matte finish.
The chalk paint will need to be sealed with polyurethane to help prevent scratching. Polyurethane can also add a shiny look to furniture.
Alkyd-based paints are ideal for the wooden pieces that you use every day. It dries hard and rigid, adding a layer of protection for the wood.
These types of paints will hold up better to scratches and long-term use.
You will have to ensure the paint you choose has the same base as your primer. You can not use water-based paint with an oil-based primer and vice versa.
How to Paint Over Stained Wood?
Before you can paint the stained wood, you have to prepare the wood. You can use the steps I previously described to prepare the wood.
After you have prepared the stained wood, you can use the following steps to paint over the stained wood.
- Prime the wood. You should use a water-based primer when you are covering a water-based stain. You can use an oil-based primer whether the stain is oil or water-based. Just make sure your paint has the same base as the primer. You will have to apply a primer when covering up dark stains. The primer can help prevent the stain from bleeding through the paint.
- Allow the primer to dry. The time it takes for the primer to dry will depend on your primer. You can read the label on the primer can to determine how long the primer needs to dry fully.
- Time to paint the wood and let it dry according to the label on the paint. Apply a second coat of paint if necessary.
- Once the paint is dry, you can apply a varnish or clear coat. You do not have to apply a clear coat, but it can help protect the wood from scratches and minor damage.
- After your project is fully dry, you can replace any removed hardware.
Best Primers for Painting Over Stained Wood
It is important to prime stained wood before you paint it. The stain on the wood can bleed through the paint even when you sand down the wood.
Below, I have suggested the top two primers for stained wood. If you choose to use a different primer, you should ensure that the primer has stain-blocking additives.
1. Zinsser Cover Stain
Zinsser’s cover stain primer is oil-based. It will cover dark oil-based stains. This primer is an excellent option if you do not have the time or patience to sand your stained wood.
The label on this primer states you do not have to sand the surface before using it.
The primer will be dry and able to be recoated within 2 hours. It will be dry to the touch in approximately 30 minutes, but you should wait 2 hours before you paint over it. You can use the primer for interior or exterior surfaces.
2. INSL-X Prime
All INSL-X’s primer is acrylic-based. It has powerful stain-blocking additives making it a great primer for stained wood.
After all, you want a primer that will prevent the stain from bleeding through the new coat of paint.
This primer will be dry and ready for another coat within 1 hour. You can use this primer with acrylic or latex paints.
It is also a low VOC primer making it great for your overall health.
Best Paints for Painting Over Stained Wood
You know how to prime and paint over stained wood. You also know which primer is the best to use. I can not let you leave without suggesting the top paint, right?
Below, I have provided the top two paints you should use when painting over stained wood.
1. Rust-Oleum’s Chalked Paint
You can use any color in the Rust-Oleum’s chalked paint line on wood. Chalk paint is best for matte or distressed finishes on wood surfaces.
These paints are designed for interior surfaces. You should be cautious if you choose to use them on exterior surfaces.
The paint will be dry to the touch within 30 minutes. I would still recommend using a primer, but you do not have to.
You can test a small bit of paint on the wood and see if the stain bleeds through the paint.
You can paint without a primer if the stain has not bled through after 8 hours.
2. Rust-Oleum’s Latex Paint
These latex paints are also available in multiple colors. You can use it on interior or exterior surfaces.
The paint should dry within 30 minutes. The latex paint will go on smooth and will leave little to no brush strokes in the paint.
Verdict
While it is possible to paint directly over stained wood, it is not widely recommended. The stain will need to be sanded down to allow the paint to adhere to the surface better.
If you do not prep the wood, your paint may adhere to the surface, but it will not last long.
You will save yourself headaches and time if you simply prep the stained wood before painting it.
Thankfully, you will not be limited on the kind of paint you can use once the wood is prepped.


